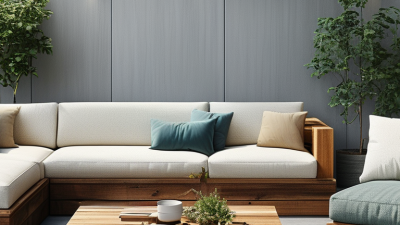

What Are the Top Types of Outdoor Kitchen Islands?

Choosing the right outdoor kitchen island begins with understanding how people actually cook, serve, and gather outdoors. A compact island may suit a balcony-sized patio, while a larger L-shaped or U-shaped layout can support several cooks. Built-in islands offer a polished, permanent appearance. Modular islands provide easier installation and future changes. Portable units add flexibility, especially for renters or homeowners who move often.

Russ Faulk, an outdoor kitchen designer and former Chief Grilling Officer at Kalamazoo Outdoor Gourmet, has said, “An outdoor kitchen is an extension of the home.” That idea matters when comparing outdoor kitchen island styles. A grill, refrigerator, sink, and preparation counter should work together, not simply look attractive in photographs. Think about where smoke travels, where guests stand, and how far you carry hot food. Small details matter. A poorly placed trash bin can interrupt the entire cooking rhythm.

This guide examines the top types of outdoor kitchen islands, including straight-line, L-shaped, U-shaped, peninsula, modular, and portable designs. Each option has strengths, limits, and different maintenance needs. Stainless steel handles weather well, but it still needs regular cleaning. Stone counters feel substantial, yet some surfaces can stain or crack. Measurements also require care. A beautiful island may become inconvenient if walkways feel narrow. The most practical choice is not always the largest one. Sometimes, simpler works better. Every property differs, so confirm utility placement, ventilation, and local safety requirements before installation.
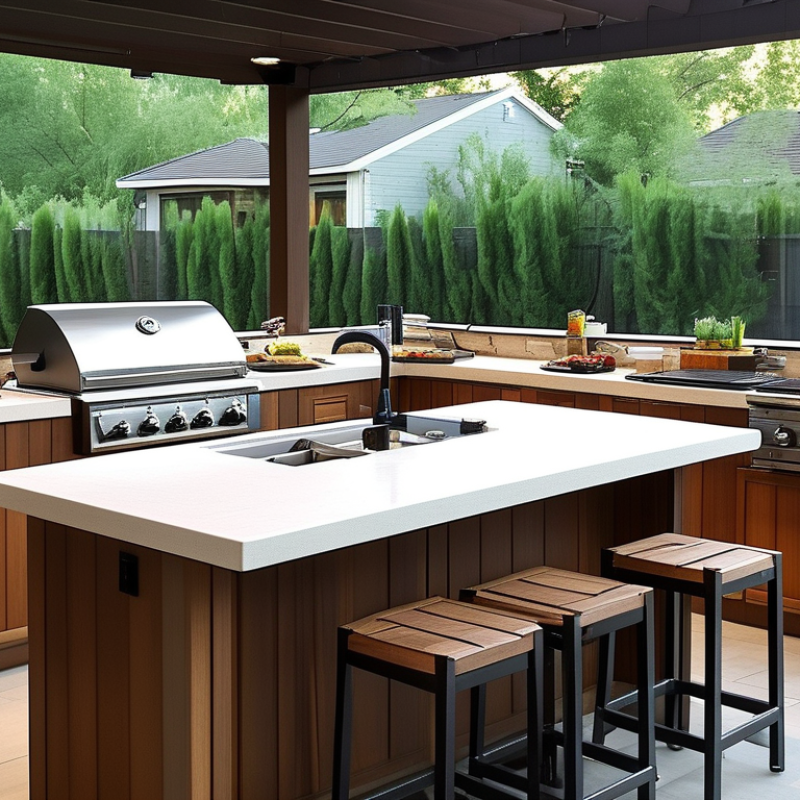
What Are the Top Types of Outdoor Kitchen Islands?

Classify Outdoor Kitchen Islands by Layout, Mobility, and Construction

Outdoor kitchen islands are best classified by layout, mobility, and construction. Each category affects cooking flow, storage, maintenance, and installation costs.

A straight island suits narrow patios and keeps preparation simple.

L-shaped layouts create separate cooking and serving zones.

U-shaped designs offer generous counter space, but they can restrict movement in smaller yards.

Peninsula islands connect to a wall or indoor kitchen, reducing walking distance between spaces.

Mobility creates another useful distinction.

Freestanding islands can be repositioned when entertaining or redesigning the patio. Rolling carts provide flexible prep space, especially for renters or seasonal cooking. Fixed islands feel more substantial and usually support heavier appliances, sinks, and built-in storage.

However, mobility has limits. Uneven pavers, crowded walkways, and heavy countertops can make a movable unit frustrating to handle.

Construction materials also define performance.

Masonry islands resist heat, moisture, and strong winds when properly installed. Stainless steel frames are lighter and easier to clean, though they may show scratches quickly.

Modular panels simplify installation and future changes, but their joints need careful sealing.

I once underestimated how much afternoon sun could heat a dark countertop. That mistake affected food preparation and comfort.

Light-colored surfaces, shaded work areas, and weather-resistant hardware often provide better daily value.

Check drainage, ventilation, and local electrical requirements before construction. Small oversights become expensive outdoors.

Linear Islands: Compact Runs Guided by NKBA’s 12–15-Inch Landing Rule

Linear Islands: Compact Runs Guided by NKBA’s 12–15-Inch Landing Rule

A linear outdoor kitchen island keeps cooking, preparation, and serving in one efficient line. It works well on narrow patios, balconies, and small terraces. The layout can include a grill, compact refrigerator, sink, and counter workspace. However, every appliance needs a safe landing area beside it. NKBA guidance commonly recommends about 12 to 15 inches of counter space for landing. This space gives cooks somewhere to place hot pans, utensils, or prepared ingredients.

Measure the island before selecting appliances. A grill may need landing space on both sides, while a refrigerator benefits from a clear counter nearby. Leave enough room for cabinet doors and walking traffic. A 12-inch landing can work in a tight design, but 15 inches feels more comfortable during busy cooking. Small details matter. Keep heat-producing equipment away from combustible surfaces, and follow local building and electrical requirements.

I once assumed a straight run would always simplify planning. It did not. Poor spacing can make a compact island feel crowded and awkward. Weather also changes the decision. Wind, rain, and direct sun may affect appliance placement and countertop durability. Use heat-resistant, weather-suitable materials, and check clearances carefully. The rule is a guide, not a complete design. Measure twice. Adjust when real movement exposes a problem.

What Are the Top Types of Outdoor Kitchen Islands? - Linear Islands: Compact Runs Guided by NKBA’s 12–15-Inch Landing Rule

Planning values are practical residential guidelines. Confirm local building, electrical, gas, fire-safety, and weather-resistance requirements before construction.
Linear Island Element Recommended Dimension or Rule Purpose in a Compact Run Planning Notes
Typical overall linear length Approximately 6–10 ft for a compact residential run Fits cooking, preparation, and limited storage into one straight footprint The final length depends on appliance widths, cabinet modules, landing areas, and available circulation space.
Counter height About 36 in for standard food-preparation height Provides a comfortable working surface for standing tasks Use a separate raised section only when seating, wind protection, or visual separation is needed.
Counter depth Approximately 24–30 in, excluding additional overhang Accommodates outdoor-rated appliances, work space, and utility connections Confirm the manufacturer’s required clearances and ventilation zones for every appliance.
Cooking-surface landing area At least 12 in on one side and 15 in on the other side Provides a safe place to set down hot cookware, utensils, and food This is the NKBA planning guideline referenced by the 12–15-inch rule; local requirements may differ.
Continuous landing surface Keep landing space directly adjacent to the cooking appliance Reduces carrying distance and helps prevent spills or dropped cookware Avoid placing a tall cabinet, corner obstruction, or open passage between the appliance and its landing area.
Sink landing areas Plan approximately 24 in on one side and 18 in on the other side where practical Supports rinsing, food preparation, and temporary placement of dishes If the run is too short, prioritize a usable landing surface beside the sink rather than filling every section with appliances.
Work aisle behind the island About 42 in for one cook; about 48 in for multiple cooks Allows doors, drawers, and appliance lids to open while maintaining movement Measure between opposing countertops, walls, railings, or other fixed obstructions.
General passageway At least about 36 in where the space functions primarily as a walkway Maintains access around the linear island Do not count appliance doors, drawer fronts, or temporary furniture within the clear passage width.
Appliance grouping Place refrigeration, preparation, and cooking functions in a logical left-to-right or right-to-left sequence Creates a simple workflow within the straight run Keep frequently used tools and ingredients near the preparation zone to reduce cross-traffic.
Utility access Provide accessible shutoffs, drainage, electrical service, and ventilation paths Supports safe installation and future maintenance Outdoor installations may require weatherproof electrical components, protected plumbing, and approved fuel connections.
Weather-resistant surface Use a nonporous or properly sealed countertop with sloped, controlled drainage where appropriate Helps manage rain, humidity, staining, and temperature changes Select materials according to the site’s freeze-thaw exposure, ultraviolet exposure, and maintenance requirements.

L-Shaped Islands: Separate Prep and Serving Zones in One Footprint

What Are the Top Types of Outdoor Kitchen Islands?

L-shaped islands create separate prep and serving zones within one footprint. The shorter leg can hold a grill, sink, or compact refrigerator. The longer leg supports plating, drinks, and casual seating. This layout keeps hot cooking tasks away from guests. It also creates a natural corner for conversation.

The National Kitchen & Bath Association’s 2024 Outdoor Living Report identifies cooking and dining as major priorities in outdoor spaces. The American Society of Landscape Architects’ 2024 residential trends survey also lists outdoor kitchens among frequently requested landscape features. These findings support the L-shaped plan, especially for homeowners seeking practical entertaining space. Keep at least 36 inches of working clearance around active stations. Aisles near grills often work better at 42 inches. Real projects are rarely perfect. Corners can become awkward storage traps without careful planning.

Tips: Place the grill on the shorter leg when possible. Keep the sink near the main prep surface. Add a 12- to 15-inch landing area beside heat-producing equipment. Choose weather-resistant surfaces with a slightly textured finish. Smooth counters can become slippery after rain. Seating should face the serving zone, not the grill. I have seen attractive islands fail because smoke drifted toward dining chairs. Recheck prevailing wind direction before final installation.

L-Shaped Outdoor Kitchen Islands: Separate Prep and Serving Zones

An L-shaped island can organize cooking and serving activities within one footprint. These commonly used residential planning dimensions help maintain comfortable movement, food preparation space, and seating access.

Dimensions are shown in inches. Actual requirements may vary according to local building codes, appliance specifications, and site conditions.

U-Shaped Islands: Apply NKBA’s 42-Inch Single-Cook Aisle Standard

A U-shaped outdoor kitchen island creates a compact, efficient work zone. Its three-sided layout keeps cooking, washing, and preparation within easy reach. For one cook, the NKBA recommends a 42-inch aisle between opposing counters. This space supports safer movement without making the island feel oversized. It also allows appliance doors and drawers to open more freely.

Measure the aisle after installing cabinets, handles, and countertop edges. Small details matter. A grill door can extend several inches into the walking path. Place the grill away from the busiest entry point, and keep the sink near the main preparation surface. Store frequently used tools in drawers along the open side. This reduces unnecessary crossing during cooking.

Weather changes outdoor planning. Rain, heat, and uneven flooring can affect comfort and movement. Leave sufficient ventilation around heat-producing appliances, while protecting electrical components from moisture. Seating outside the U should not narrow the working aisle. A 42-inch clearance is a starting point, not an automatic guarantee of comfort. A taller cook may need more room, especially when turning with a hot pan. It is tempting to use every inch of the island, but that decision can create awkward bottlenecks. Walk through the layout with cabinet doors open. Then adjust.

Modular and Mobile Islands: Combine 36-Inch Counters with 15-Inch Overhangs

Modular and mobile outdoor kitchen islands offer practical flexibility for changing patios and entertaining needs.

A 36-inch counter height matches most comfortable food-preparation surfaces. It also supports safer chopping, plating, and serving. The 15-inch overhang creates useful knee space for outdoor stools. Guests can sit without pressing against the island cabinet. Keep the overhang edge smooth and slightly rounded. I have found that this detail reduces bumps during busy gatherings.

However, every patio has different circulation patterns. Measure walking clearance before choosing the final island position.

A mobile island should have locking casters and a balanced frame. Otherwise, the unit may shift when someone leans against the counter. Weather-resistant panels, sealed joints, and corrosion-resistant fasteners improve long-term reliability. Drainage matters too. A slight surface slope can prevent rainwater from pooling near cabinet doors. Overhangs wider than 15 inches may need concealed brackets or additional structural support.

Cooking equipment also needs stable placement, proper ventilation, and safe separation from seating. Check local outdoor installation requirements before connecting utilities. I once underestimated afternoon wind on an open terrace. Lightweight stools moved constantly, making the generous overhang less useful. That mistake changed how I plan seating and island weight. A modular layout works best when each section can be relocated without damaging the patio surface.

Go to Top